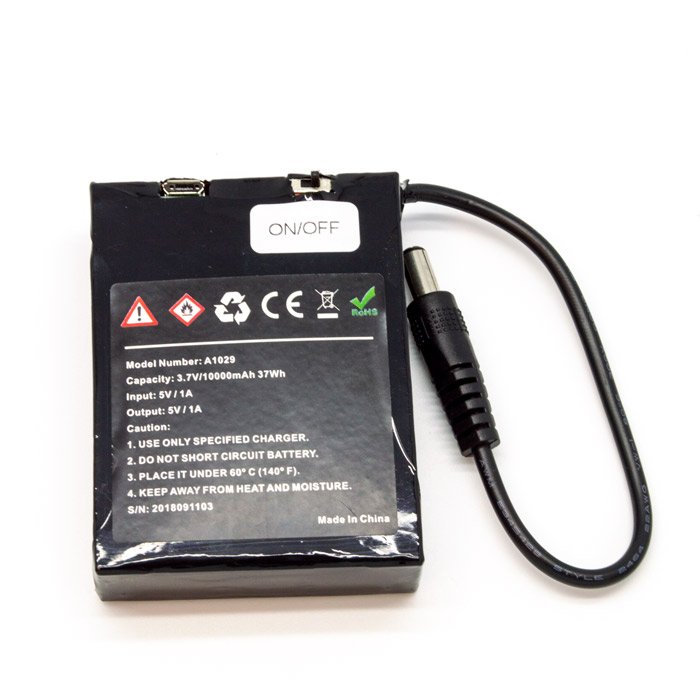
Xtreme Life 90 Day Rechargeable Battery – A1029
Xtreme Life Hidden Cameras run on rechargeable battery power . Power provided by the A1029 produces up to 90 days of life to your Xtreme Life hidden camera system.
Description
![]()
More Xtreme than Ever Before. This Xtreme Life Battery provides more power, up to 90 days of battery life.
- Long lasting Li-Ion Battery
- Extends Battery Life of Xtreme Life Products
- Powers Xtreme Life Hidden Cameras up to 90 Days
- Charges nearly anywhere via USB 2.0
Specifications:
- Li-ion Battery
- DC 5V 1000mA Input
- DC 5V 1000mA Output
- 10,000 mAh Capacity
- Full Charge 9-10 Hours
- Up to 16 Hours Continuous Power
- Up to 90 days standby power
- Temperature -10 ~ 45 C;Charge Time 9-10 Hours
Dimensions: 2” L x 1” W x 3.375” H
Weight: 0 lb 6 oz
Download Specification Sheet
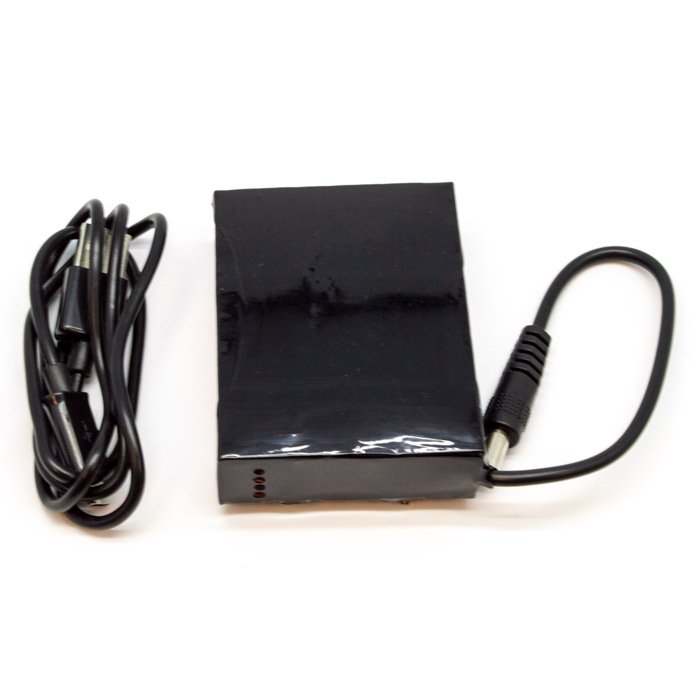
Included with this item
- Xtreme Life 90 Day Rechargeable Battery
- USB Charging Cable
Setup:
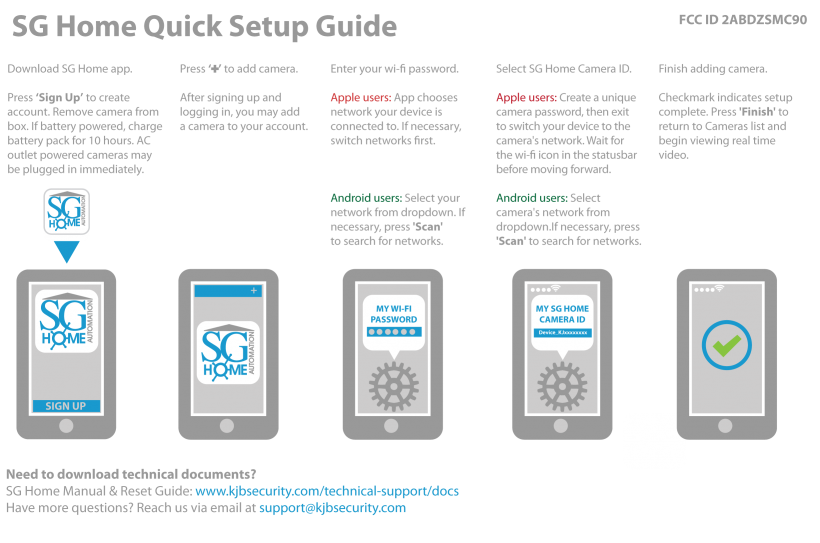
How to Set Up Your SG Home Camera on an iOS Device

SG Home Wi-Fi Quick Setup Guide
Step 1. Download the SG Home App from Apple Store or Google Play to your smartphone or tablet. Press ‘Sign Up’ on the login screen to create a secure account. Open the SG Home Camera to insert memory card into the memory card slot, connect the power supply, and power on the camera. Battery models: charge the battery pack first for approximately 10 hours for a full charge.
Step 2. After logging into the SG Home App, press ‘+’ at the top right of the screen to add a camera to your account.
Step 3. Follow the on-screen instructions to select your 2.4 GHz wireless network and enter its password:
Apple devices: The app chooses the network your device is connected to. If necessary, temporarily leave the app to switch networks on your device prior to returning and pressing ‘Next’ to enter the network password.
Android devices: Select the preferred network from the dropdown list in the app, then press ‘Next’ to enter the network password. If necessary, press ‘Scan’ to search for available networks.
Step 4. Follow the on-screen instructions to select your camera’s network (ex. Device_KJxxxxxxxx) to set it up with your network’s credentials and create a unique camera password (Note: This is the password for the camera only, not the password for your wireless network or the app login):
Apple devices: Create a unique camera password and press ‘Next’. Temporarily leave the App to switch networks to the camera’s network, then return to continue setup. Wait for the wi-fi icon to show in the status bar before moving forward.
Android devices:Select the camera’s network from the dropdown list in the app, then press ‘Next’ to create a unique camera password. If necessary, press ‘Scan’ to search for available networks.
Step 5. Wi-Fi setup is complete when you see the green checkmark. Press ‘Finish’ to return to SG Home Cameras list and begin viewing real time video.
All devices: there may be a few seconds delay while your device reconnects to your network and the App logs back in to the servers to retrieve your camera list
Documentation:
Download SG Home Wi-Fi Manual
Download SG Home WiFi Reset Guide
Setup:

Xtreme Life DVR can be set up in 5 simple steps.
It helps to have your TV user’s manual nearby since you may need to change video input on the TV used for initial set-up.1. Take the unit from box and ensure you have received all included items.
2. Open the device to insert the memory card into the memory card slot and connect the battery, turning it on after the connection is made.
3. To confirm the device is ready, connect the provided video cable from the unit to your TV video input and create motion in front of the camera to see a live video feed and make a sample recording.
4. Your device is now ready to be placed in the area of desired surveillance.
5. Default recording setting is PIR detection. Once the power is turned on and the device recognizes the memory card, the DVR will begin to record based on PIR detection(see note below).
Special Note about PIR (Passive Infrared) Technology:
Each Xtreme Life™ DVR has a built in PIR sensor that detects levels of infrared radiation, the use of which makes the battery life so long. Everything emits some level of radiation. The hotter an object is the more radiation it emits. Changes in radiation levels are considered as motion by the DVR, which will then turn on and begin to record. The PIR sensor requires very little power, so the DVR will be off even though the PIR sensor is still detecting radiation. When the PIR detects a change in radiation, the DVR will turn on and begin to record. The DVR takes approximately 3 seconds to turn on and start recording.
Zone Shield 4K DVRs use a Menu Setting App to customize the user’s camera settings. Follow the steps and diagram below to set up your Zone Shield 4K Camera settings using the Menu Setting App.

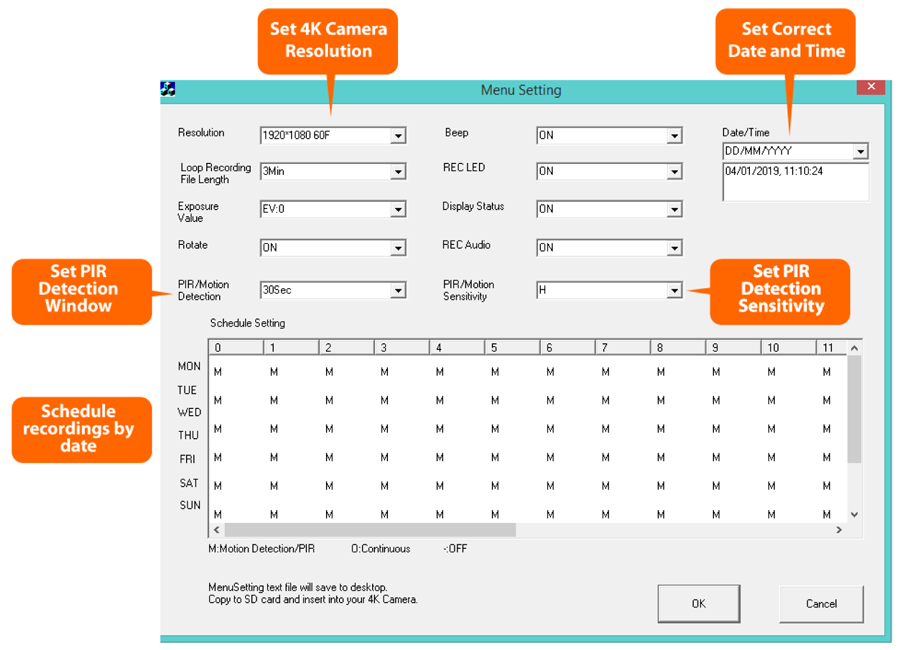
Download Zone Shield & Xtreme Life 4K Manual with Scheduling
Download Zone Shield & Xtreme Life 4K Manual without Scheduling
Download 4K Menu Settings Update For Windows And MAC
Additional information
| Weight | 0.375 lbs |
|---|---|
| Dimensions | 2 × 1 × 3.375 in |